lunch, protein, recipe

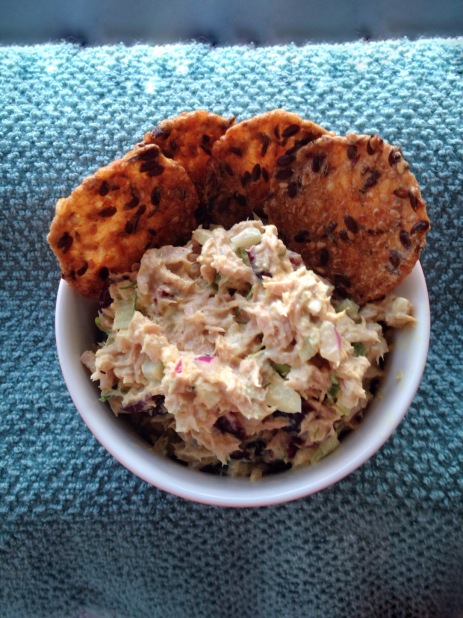
Curried Turmeric Tuna Salad


A few weeks ago, I went to a corner cafe in Hermosa Beach to get some lunch. I looked at the menu and there was a wrap called “KARI.” I instantly ordered it and didn’t read the ingredients because if there is a menu item bearing your namesake with correct spelling, you order it! What arrived to me wrapped neatly in parchment paper was a whole wheat wrap with avocado, greens, sprouts, and an amazing curried tuna salad. I gobbled it down as I marveled over the fact that there was a wrap called the Kari served a few blocks from my house…day made! (Disappointingly, there was not a story behind why it was called the Kari…)

Tuna salad is an easy way to have lunch made for the week. It can be served with crackers and cut veggies or topped on a salad. I like to make a batch to have on hand for lunches/snack for the boy and I to eat during the week (just be sure to limit to 1 can per week due to the mercury content.) Canned tuna provides a good dose of omega 3’s (EPA/DHA) and I am always looking for food based ways to increase my consumption of omega 3’s. The curry and turmeric add antioxidants (the curcurmin found in turmeric is a powerful antioxidant that has been linked to reductions in pre-diabetes, cancer protection, and improvements in circulation)

This salad is crisp and crunchy, with warmth from the turmeric and curry powder. I am leaving for Europe TOMORROW and can’t wait to enjoy my curried tuna sandwich on the 13 hour journey (mints included!).

Curried Turmeric Tuna Salad

Ingredients

  • 1 can solid white albacore tuna
  • 1/4 c organic/paleo mayo
  • 1/2 c nonfat Greek yogurt
  • 1 heaping teaspoon curry
  • 1/2 teaspoon turmeric
  • 1/2 teaspoon dried dill
  • 1/4 c minced onion
  • 1/4 c chopped fennel fronds
  • 1/4 dried cranberries
  • fresh ground black pepper

Directions

  1. Combine all ingredients in a bowl.
  2. EAT! Goes great with whole grain crackers, wrapped in lettuce, topped on a salad, or classically as a tuna fish sandwich.
dinner, healthy, paleo, recipe, side dish, vegan, vegetables

Roasted Delicata Squash with Lemon Tahini Sauce


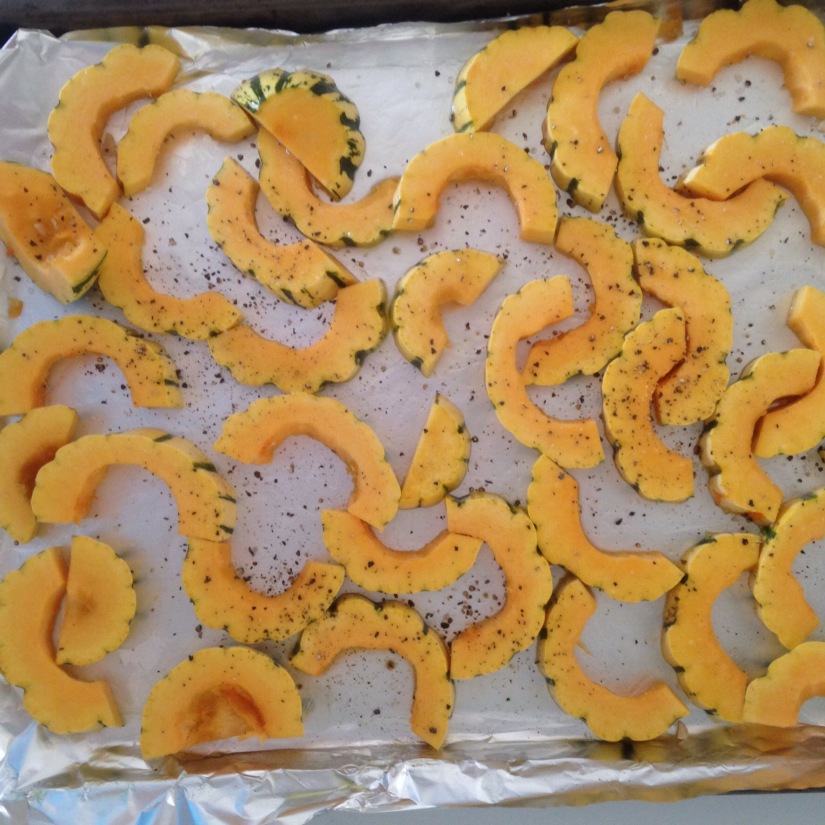
Roasted squash in the middle of August may not sound exactly tempting, but when I saw these squash at Whole Foods, I couldn’t resist. After cooking, the skin of the delicata squash softens and you can eat it! Meaning, no need to peel the skin, just trim and cook! I love anything that saves me an extra few minutes in the kitchen and so I braved the oven and got cooking.

What sets this recipe apart from other roasted squash is the to die for lemon tahini sauce! Tahini is one of the main ingredients when making hummus but this sesame seed paste is super versatile. It goes great in sauces and dressing to top pasta, vegetables, salad, and more. I love making a tahini dressing paired with a spinach salad and summer berries 🙂

Delicata squash is rich in beta carotene (which converts into Vitamin A). To help your body better absorb this valuable antioxidant, the addition of a healthy fat source (tahini sauce!) can help your body maintain it’s carotenoid and Vitamin A stores.


Roasted Delicata Squash with Lemon Tahini Sauce

Ingredients

  • 4 delicata squash, de-seeded and cut into half circles
  • 2 tsp olive oil
  • salt and pepper, to taste
  • 2 TBS tahini
  • juice from half large lemon
  • 2 TBS water
  • 1 tsp herbs de provence

Directions

  1. Preheat oven to 400 degrees. Line a baking sheet with foil. Place cut squash in a single layer on baking sheet. Drizzle with olive oil and sprinkle with salt and pepper to taste. Stir squash with your hands to ensure they are evenly coated with olive oil and spices.
  2. Bake in oven for ~30 minutes until squash is softened and caramelized. Halfway through cooking, flip squash allowing them to cook evenly on both sides.
  3. While the squash is cooking, prep the tahini sauce. Add tahini, lemon juice, water, herbs de provence, and fresh cracked black pepper to a dish and whisk together with a fork to combine. I also added a drizzle of olive oil to bring the dressing together.
  4. Remove squash from the oven and drizzle with tahini sauce. Serve immediately.
  5. Dressing will last in the refrigerator in a mason jar for 3-5 days.
dietitian, entertaining, gluten free, how to

Building A Charcuterie & Cheese Board + Giveaway!

Our most recent cheese board creation.

My boyfriend and I love charcuterie nights. On our first date we split a charcuterie and cheese board- talk about a great way to get to know someone. We bonded over beautiful board of olives and prosciutto and manchego and since then we’ve maintained our hot and heavy relationship with cured meats and delicious cheese. Our dating relationship is going okay too 🙂

One thing that every twenty something should know is how to put together a good charcuterie and cheese board. Here are my tips:

  1. It starts with a good cutting board. I like dark wood that looks aged and unique, drawing attention to your spread.

    My go-to charcuterie board
  2. Charcuterie and cheese. My favorite charcuterie is an aged peppered salami. I try to choose one that is locally produced, with no nitrites, and ethically sourced (if possible). My cheese choices run the spectrum- a creamy, melty brie or a sharp grass fed cheddar.  I also will pick a cheese if the name is interesting, a very scientific approach.
  3. Accoutrements. My go to is whole grain mustard, artisanal jam (I have an amazing blackberry lavender jam that I bought when I lived in New Hampshire), along with olives, mini pickles, local dates, or truffle honey.
  4. The crackers. As a dietitian, I feel it is my duty to get people to eat more fiber so I choose a whole grain cracker with at least 2 g of fiber per serving.

To celebrate my love of charcuterie and cheese boards, I am teaming up with Crunchmaster crackers to offer one follower a 6 variety pack of Crunchmaster Gluten Free Crackers. These crackers go great with charcuterie and cheese but are also a great gluten free option for snacking. I like to bring whole grain crackers and hummus or cottage cheese to work as a mid-day pick me up.

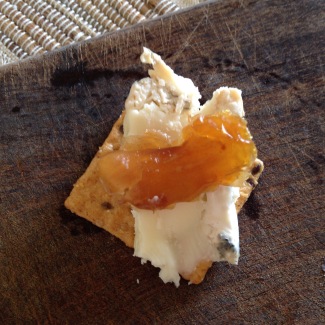
Crunchmaster Multi-Grain cracker with aged local goat cheese and dates

These crunchy crackers are full of whole grain goodness. In my sample pack I received:

  • Multiseed Crackers
  • Multigrain Crackers
  • 7 Ancient Grain Crackers

My favorite were the Mulitgrain Crackers. The serving size was 16 crackers which provided 3 g of fiber and 23 g of carbohydrate. I would recommend them to my diabetic patients for snacks or meals because it would allow them to feel satisfied with a lower impact on their blood sugars. I also liked their light, crisp bite that paired well with my go to dip (cottage cheese with olive oil, black pepper and Hawaiian Red Sea salt).

Here’s how to enter the GIVEAWAY- 

1) Follow me on Instagram (@kari_on_nutrition)
2) Tag a friend and post your favorite cracker combination in the comments. If you post a photo on Instagram of your cracker combination, you will receive 2 entries! Be sure to use the hashtag #KariOnNutritionGiveaway and tag me in the photo (@kari_on_nutrition).
3) Winner will receive a 6 variety pack of Crunchmaster gluten free crackers.

Giveaway will end July 3rd.

Here are some helpful links if you want to try Crunchmaster for yourself!

http://www.facebook.com/crunchmaster
https://twitter.com/luvcrunchmaster
http://pinterest.com/crunchmaster/

Here is a link to a coupon so you can try Crunchmaster!

http://crunchmaster.com/coupon.aspx

Disclosure: Crunchmaster sent me crackers to sample. All opinions expressed are my own. I was not compensated financially for my opinions, featuring Crunchmaster on my blog, or offering the giveaway. 

main dish, recipe, side dish

Southwest Kale and Black Bean Quinoa Salad

Southwest Kale and Black Bean Quinoa Salad

I’ve been majorly MIA but when I’m not blogging you can most definitely find me ‘grammin on @kari_on_nutrition. However, I am trying to post more deliciousness on my blog.

What’s eaten up all my time? I recently started a new second job! Every Friday I head to Westwood and work in the radiation oncology department at UCLA. I’ve always been interested in oncology and the opportunity to work at the 5th ranked health system in THE COUNTRY was something that I couldn’t pass up. Never have I felt more challenged or learned so much in such a short amount of time. I often question if I’m the right fit for the job, however if it scares me that much than maybe it’s a right fit!

How does my job at UCLA relate to my Southwest Kale and Black Bean Quinoa salad? I stopped at Whole Foods for lunch last week and bought a delicious albeit expensive bowl of kale, nectarine, and quinoa salad. As I was eating it, I realized I could spend WAY less money if I made said quinoa salad myself. So last night after soccer, I brought this baby to life.

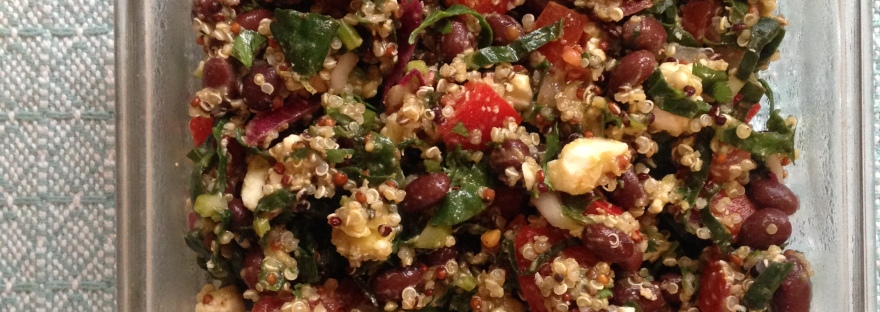
It’s protein packed and full of veggie goodness. Plus as a bonus, it includes homegrown tomatoes from my parents garden, local kale, and California avocados. Sustainable eating= happy Kari. I ate it over a bed of more kale and added some sliced chicken. It is great as a main dish or a side dish and would go great at a 4th of July BBQ (just sayin….)

Southwest Kale and Black Bean Quinoa Salad

Ingredients

  • 1 cup cooked quinoa (I used tri-color quinoa)
  • 3-4 leaves of lacinto kale, Julienned into strips
  • 1 can black beans, rinsed and drained
  • 1 red bell pepper, diced
  • 1 avocado, diced
  • 3 tomatoes, chopped
  • 1/4 red onion, minced
  • 1/4 c chopped cilantro
  • juice from 2 limes
  • Olive oil
  • 1 tsp cumin
  • 1/2 tsp ancho chile powder
  • 1/2 tsp each onion and garlic powder
  • salt and pepper to taste
  • 2 oz feta cheese (optional)

Directions

  1. Add first 9 ingredients to a bowl and combine.
  2. Drizzle with ~ 1-2 TBS olive oil. Add spices little by little, tasting to see if it needs more. I don’t typically measure my spices- I just add and taste until it’s perfection 🙂

Enjoy!!

baking, blogging, breakfast, brunch, dietitian, healthy

Best Ever Banana Bread 

Its been awhile…but I’ve been waiting for a very special occasion to share a new recipe with y’all! I’m a blogger for Food and Nutrition Magazine’s blog, Stone Soup and had one of my all time favorite eats posted today! Be sure to check out my post on the Stone Soup Blog and read below! 

Looking for a recipe for Mother’s Day brunch? You need a crowd-pleaser — but instead of overloading the table with more egg dishes, appetizers and salads, how about baked goods?

My mom has been making variations of her banana bread for years. Sometimes she will add walnuts or pecans — or, if she’s feeling indulgent, chocolate chips (my personal favorite). Regardless of the additions, it is hands-down the best banana bread I have ever eaten!

In honor of Mother’s Day, I decided to pay homage and put a dietitian’s take on the best banana bread ever.

The “3 R’s”: of Baking: “Reduce, Replace or Remove”

I substituted in whole-wheat flour and cut back on the sugar and fat. Applesauce keeps the bread moist and bananas provide enough sweetness that no one will be able to tell I reduced the amount of sugar.

If you feel like getting fancy for your next brunch, you can also turn this delicious banana bread into an even more delicious banana bread French toast! This recipe also makes great muffins — but be sure to reduce the cooking time to 35 minutes.

Mother's Day Banana Bread | Food and Nutrition Magazine | Stone Soup Blog

Mother’s Day Banana Bread

Recipe by Kari Ikemoto, RD

Ingredients

  • 2 mashed, ripe bananas
  • ⅓ cup buttermilk (I make this from scratch: add 1 tablespoon white vinegar or lemon juice to 1 cup milk)
  • ¼ cup oil (I prefer coconut or canola oil)
  • ½ cup applesauce
  • 2 eggs whites
  • 1¾ cup whole-wheat flour
  • 1 teaspoon baking soda
  • Scant ¾ cup sugar (a little less than ¾ cup)
  • 1 tablespoon chia seeds
  • 1 teaspoon hemp seeds
  • Optional: ½ cup chopped nuts

Directions

  1. Preheat oven to 325°F.
  2. Spray pan loaf pan with cooking spray.
  3. Combine banana, buttermilk, eggs, applesauce and oil in a bowl.
  4. In a separate bowl mix the flour, sugar and baking soda.
  5. Add dry ingredients to wet ingredients. Stir in nuts or other additions (like blueberries or chocolate chips).
  6. Pour into loaf pan. Bake for 1 hour and 30 minutes.
dietitian, exercise, food blogger, Hermosa Beach, recipe, registered dietitian, South Bay, sports nutrition, workout fuel

Poise Fitness

image1

Well! It’s been awhile! A lot has been going on in the Kari On Nutrition camp. Here’s what’s happened since I last posted:

  • I accepted a position at UCLA as a radiation oncology RD (!!!)
  • Spent a week in Kauai for my birthday (check out my Instagram @kari_on_nutrition for photos!)
  • Collaborated with #RD2Be Tawnie Kroll of Kroll’s Korner on a Q&A post for students (check the post out here!)
  • Had my roomie from my dietetic internship visit from Boston
  • Repeal the Seal and the Kids Eat Right Kraft debacle

Two weeks packed into 5 bullet points…impressive I know!

Sprinkled in between all this was a visit to Poise Fitness in Hermosa Beach. A few of my friends had been telling me about a class they had been taking at Poise, so I decided to take the plunge and e-mail Justin (the owner). After exchanging some e-mails with him, I decided to take the plunge and sign up for a 5:30 AM class (!!!)My friends were right! I loved the class! Each week, Poise focuses on a different goal or movement. The week I came in, the focus was abs. The gym is split into three sections – functional movement (body weight exercises, flexibility, core), cardio (in the form of treadmills), and strength (weights, kettle bells). There are 10 rounds in each section, for a total of 30 rounds, 1 minute each. What I loved the most about this set up was:

  1. There were tablets that showed each movement. Along with the coach explaining the movement, we had a demonstration of how to do the movement correctly, ensuring proper form and optimizing our work out
  2. The movement changed every rotation. Talk about zero workout boredom. By constantly changing what movement we did, I knew that I was getting a total body workout
  3. You could control the intensity on the cardio. I remember during one of our last sets on the treadmill, the instructor was pushing us to increase our speed. I was feeding off his positive energy and upped the speed to 9.0, which I would not typically do in the gym on my own

This class was the ultimate HIIT workout. I wore my Polar heart rate monitor to track my fitness. I like using a heart rate monitor because it allows me to push myself more to get within my training goals to optimize fat burning and maximize my cardio effort. Tracking systems help me to monitor my progress and give me a way to gauge how I can improve. I highly recommend getting a heart rate monitor if you are looking to up the ante on your fitness goals. It’s a great motivator and can help you to challenge yourself to do more.

According to my Polar:

  • Max heart rate: 173 bpm
  • Average heart rate: 128 bpm
  • Calories: 606
  • 61% fitness (cardio)
  • 39% fat burning

To re-fuel my muscles after this workout, I like to combine protein, carbs/fiber, and healthy fats. This will replenish my muscles and keep me satisfied until lunch. A favorite post workout breakfast is my power breakfast sandwich. It’s a perfect mix of complex carbs to replenish muscle glycogen and healthy fat to provide satiety and a dose of fiber. The addition of 1 egg provides 6 grams of protein, to help with muscle rebuilding, and increase the meal’s staying power. I choose sprouted bread because it is higher in fiber and I feel is more nutritious than other whole wheat varieties. There are no fillers/additives and the ingredients are all items I can pronounce 😉

Power Breakfast Sandwich

Ingredients

  • 2 slices sprouted bread (like Ezekiel), provides 30 g carbs
  • 1/2 avocado
  • 1 egg
  • handful of spinach

Directions

  1. Toast bread.
  2. Heat a skillet over medium heat and spray with cooking spray (I prefer coconut oil spray). Crack egg into pan and cook until desired level of doneness.
  3. Mash avocado on the toast with a fork. Sprinkle fresh cracked pepper and a sprinkle of red pepper flakes. Add salt if desired.
  4. Top toast with avocado and handful of spinach.
  5. Eat & enjoy!

image2

What is your favorite post-workout breakfast? How do you re-fuel your muscles?

A special thank you to Poise Fitness for having me! It was a great workout and I can’t wait to come in again (aka tomorrow!).

Note: Poise Fitness provided me with a free class. All opinions expressed in this post are my own. 

dietitian, dinner, main dish, nutrition, recipe

Chipotle Lime Fish Tacos

Currently I am battling a nasty cold/bronchitis/the flu that has made my senses a little stuffed up and my mind a little boggled. When your sense of taste/smell has been compromised, I say go with extremes. I have found that when seriously congested, I can only taste foods that are either very spicy or very sweet- no in betweens. Similar to taste changes that occur when a patient is going through chemotherapy (ex.due to side effects of treatment) or natural taste changes as we age, we need to make slight changes in the preparation of our foods so that food will be palatable and nourishing.

My chipotle lime marinade is a great recipe that plays up spice and citrus to battle through my congested sinuses. It is spicy, smoky, zesty, and easy! It can also be used with chicken or other proteins. I’ll use it to top salads, tacos, burritos, or make enchiladas with.


Chipotle Lime Fish Tacos

Ingredients

  • 2 cod fillets (you can also substitute chicken breast or tilapia)
  • 1 can chipotle in adobo
  • 2 limes
  • 1 yellow bell pepper, sliced
  • 1/2 red onion chopped
  • 1 clove garlic, minced
  • 1 tsp cumin
  • 1 tsp paprika
  • 2 TBS chopped fresh cilantro
  • 1/2 tsp oregano
  • 2-3 TBS olive oil
  • salt and pepper

Directions

  1. Remove chipotle peppers from can and dice.
  2. Place fish or chicken in a large zippered bag or covered container. Add chipotle, juice of 2 limes, bell pepper, onion, garlic, spices, herbs, and a couple pinches of salt and pepper. Shake bag or stir to combine. Ensure that the marinade is evenly distributed on the fish.
  3. Marinate over night!
  4. Heat a skillet over medium heat and spray with cooking spray. Pour in fish with marinade. Cook until the fish is opaque and browned on both sides, about 5-7 minutes per side.
  5. Serve with fresh cilantro, shredded cabbage, and salsa. Top with sautéed marinated peppers.

#karionnutrition

dietetic intern, dietetic internship, grad school, life, nutrition, RD2Be, registered dietitian, students, studying

Stone Soup Blog Post

If you’re a member of the Academy of Nutrition and Dietetics, then you receive the fabulous Food and Nutrition MagazineA bi-monthly publication, this magazine features articles written mainly by dietitians on a variety of topics. However, what some people don’t know (but should!) is that the magazine also has a blog! And lucky for me, I was able to create a post for them! I haven’t told my story about my journey to becoming a Registered Dietitian, however this post may lend some insight. Check out my post on Stone Soup to learn my tips to nailing a dietetic internship with an underwhelming GPA. Follow the live link below!

I Had an Underwhelming GPA and Still Scored a Dietetic Internship – Here’s How I Did It

I would love your feedback on the post! Please comment below or on the Food and Nutrition page 🙂 Many of the tips can apply to landing your dream job in dietetics (or any field for that matter!)

IMG_3271

baking, breakfast, dietitian, gluten free, nutrition, recipe, snack, training

No Bake Protein Oat Bars

Three day weekends are the best! Especially when they fall on a holiday! This past weekend was filled with beach volleyball, friends, love, and absolutely gorgeous So Cal weather. I won’t go into too much detail (especially as I know the East Coast has been decimated by blizzard after blizzard..sorry New England friends!) BUT I thoroughly enjoyed summer weather and beach cruises this weekend.

Matt works a busy schedule so I try to keep granola bars (<10 g sugar, ❤ g fat, and 3 g fiber/serving- a lofty goal!) and other healthy snack options on hand. Today as he was packing his lunch, said healthy items were no where to be found. So to remedy that situation, I made use of some extra sunflower seed butter and decided to make my own granola bars!

Homemade granola bars are SUPER easy and you can control what ingredients you add. Want more protein? Add nuts or protein powder. Fiber? Chia seeds and oats can provide a soluble solution. They are so customizable that it makes you question why you spent $3.99 on that box of granola bars from TJ’s (which I did once I was done making these!) Plus, have you read the label on a protein bar from health food stores? Most have ingredients you can’t pronounce and aren’t the “clean eats” that most active individuals want to put into their body. Instead of spending the money on store bought granola/protein bars, control the ingredients and make your own! It’s healthier and YOU’RE in charge of the additives!

Everything I used in the bars today, I had on hand- that’s how easy they are! Add your favorite mix ins and experiment with what works for you! It literally took me 10 minutes start to finish to make these!

granola bars

No Bake Protein Oat Bars

Ingredients

  • 1 1/2 cup old fashioned oats
  • 3/4 c sunflower seed butter (or any nut butter)
  • 1/2 c pepitas
  • 2 scoops vanilla protein powder (any type, I used whey)
  • 2 TBS chia seeds
  • 2 TBS hemp seeds
  • 1 TBS cinnamon
  • drizzle of maple syrup
  • almond milk

Directions

  1. Add oats, sunflower seed butter, pepitas, protein powder, chia and hemp seeds, and cinnamon, stirring to combine. Mixture with be very thick.
  2. Add drizzle of maple syrup and a pour of almond milk. Combine mixture. It should begin to form together. If it is too thick to stir, add more almond milk.
  3. Combine until the mixture resembles cookie dough.
  4. Line a 9×9 baking dish with wax paper. Press granola bar mixture into dish. Fold over wax papper and remove from dish
  5. Place in the freezer to hardern for 15-20 minutes. Remove and cut into bars. Store in the freezer/refrigerator or airtight container.
blogging, dietitian, dinner, gluten free, running, training

Superfood Wild Rice

image1

Happy New Year and happy new domain! I took the plunge and went all in! I have made it my goal for 2015 to blog more and dedicate some time to learning about WordPress, developing my blog, and web design! I want to develop Kari On Nutrition into a forum for all things nutrition, dietetics, cooking, working out, with some of my life sprinkled in between. So, with that being said, let me know what you are looking to see!

Another goal for 2015…..drumroll…..

About to cross the finish line at the 2013 LA Marathon!

I want to run another marathon! If I keep it to myself, there is no one holding me accountable. However, if I share it on the internet there’s the world wide web holding me accountable, which if I do the math has the potential to be a lot of people! The last marathon I ran was the LA Marathon in 2013. I decided to run 26.2 miles for my 26th birthday and I had one of the best experiences! The course ran through my favorite city and the weather was the most perfect running day ever recorded. I also exceeded my expectations and kept on pace, running it in ~4:24 (chip time). After my lackluster Nike Women’s Half performance in October, I knew I wanted to run another race. What better way to ring in 2015 than with a marathon. I’m still deciding what race to run but am leaning towards staying in California. However, I can always be convinced to travel somewhere fun! 🙂 Any recommendations?

The second part of this goal is that I want to PR! More on that to come in another post though…

My very first marathon! Buzz Johnson Trail Run!
My very first marathon! Bizz Johnson Trail Run!

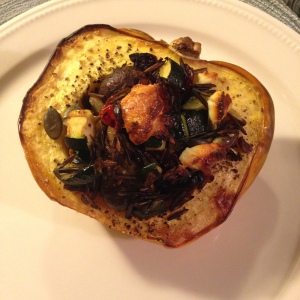
In thinking about marathons and blogging and New Years resolutions and goals comes a pretty amazing and versatile recipe that’s can make any goal seem just a little be easier to accomplish! I was inspired by a recipe I found on Chow and modified to include some superfoods for extra nutrition power! Full of Vitamin E rich pumpkin seeds, cruciferous power house brussels sprouts, and dried tart cherries rich in anthocyanins (anti-inflammatory properties that can help with muscle recovery and improved sleep, among others) this versatile whole grain/fiber friendly dish goes great stuffed in acorn squash, topped on a salad, or eaten as a post workout recovery snack! Plus, you can custimize it with whatever tickles your fancy!

Superfood Wild Rice

Ingredients

  • 8 oz wild rice, cooked
  • 1 1/2 cup roasted cherry tomatoes, mushrooms, and brussels sprouts (Toss in olive oil and roast at 400 degrees for 20-30 minutes-great second meal use for leftover roasted veggies!)
  • 1/4 cup dried tart cherries
  • 2 TBS roasted (unsalted) pumpkin seeds
  • 2 medium zuchinni, diced
  • 1/2 onion, chopped
  • 2 garlic cloves minced
  • 1 TBS coconut oil
  • 1 TBS Herbs de provence (I’m obsessed)
  • Salt and pepper to taste

Directions

  1. Cook wild rice according to directions on the package. Meanwhile, heat coconut oil in saucepan over medium heat.
  2. Add onions and cook until golden brown and translucent. Add garlic and cook until fragrant.
  3. Throw in zuchinni and herbs de provence and cook until softened, about 5 minutes. Remove from heat.
  4. Add cooked wild rice, roasted vegetables, pumpkin seeds, and dried cherries. Stir to combine, season with salt and pepper to taste.
  5. Eat and enjoy!
Acorn squash roasted and stuffed with superfood wild rice! Topped with goat cheese of course!

#karionnutrition